Maintenance Bank
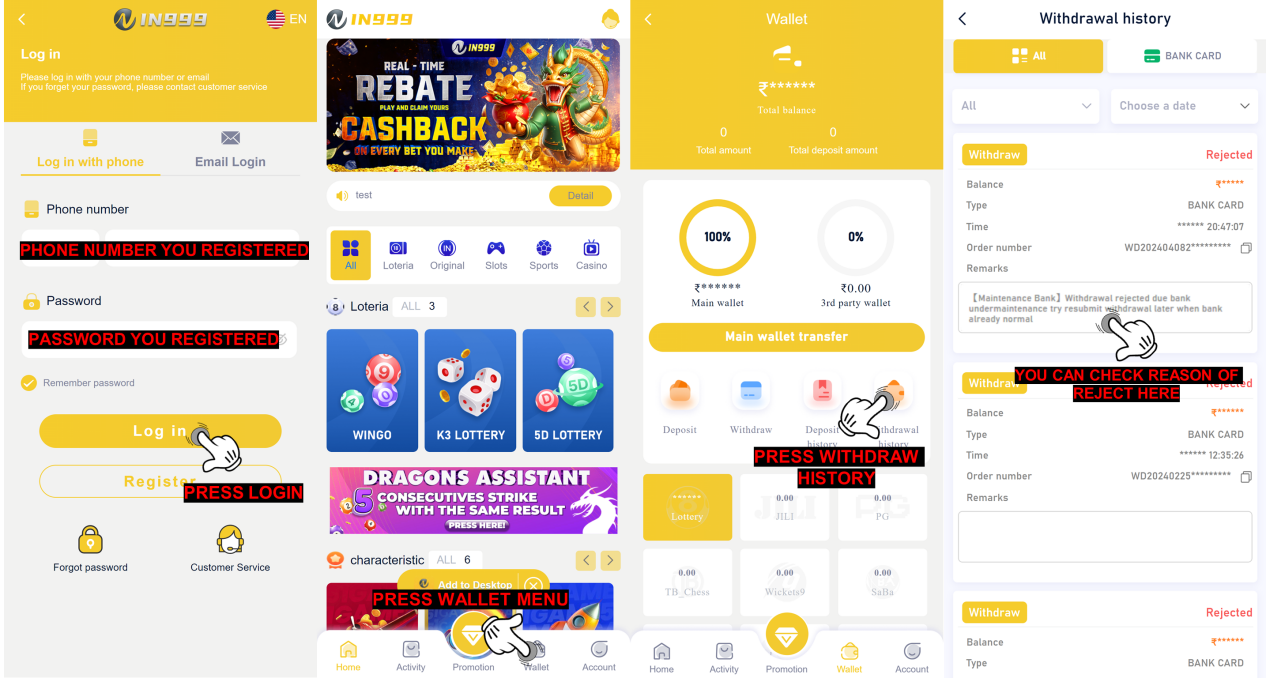
Withdrawal rejected due bank you used is under maintenance, we suggest to wait patiently till the bank online again and try to resubmit the withdrawal after few hours, or submit delete bank account on the self-service customer service center https://in999service.in/ for delete bank data inside in999Q: Why my withdraw rejected with remark bank maintenance?
A: This rejection is due to the bank you are using under maintenance for this problem we suggest you to wait patiently until the bank online again then you can try to resubmit withdrawal again.

Q: How long the bank will maintenance?
A: We apologize for the bank maintenance cannot be predicted is all depend with the bank theirself it can be fast or maybe late. Thank you!
Q: Can i change my bank data for withdrawal?
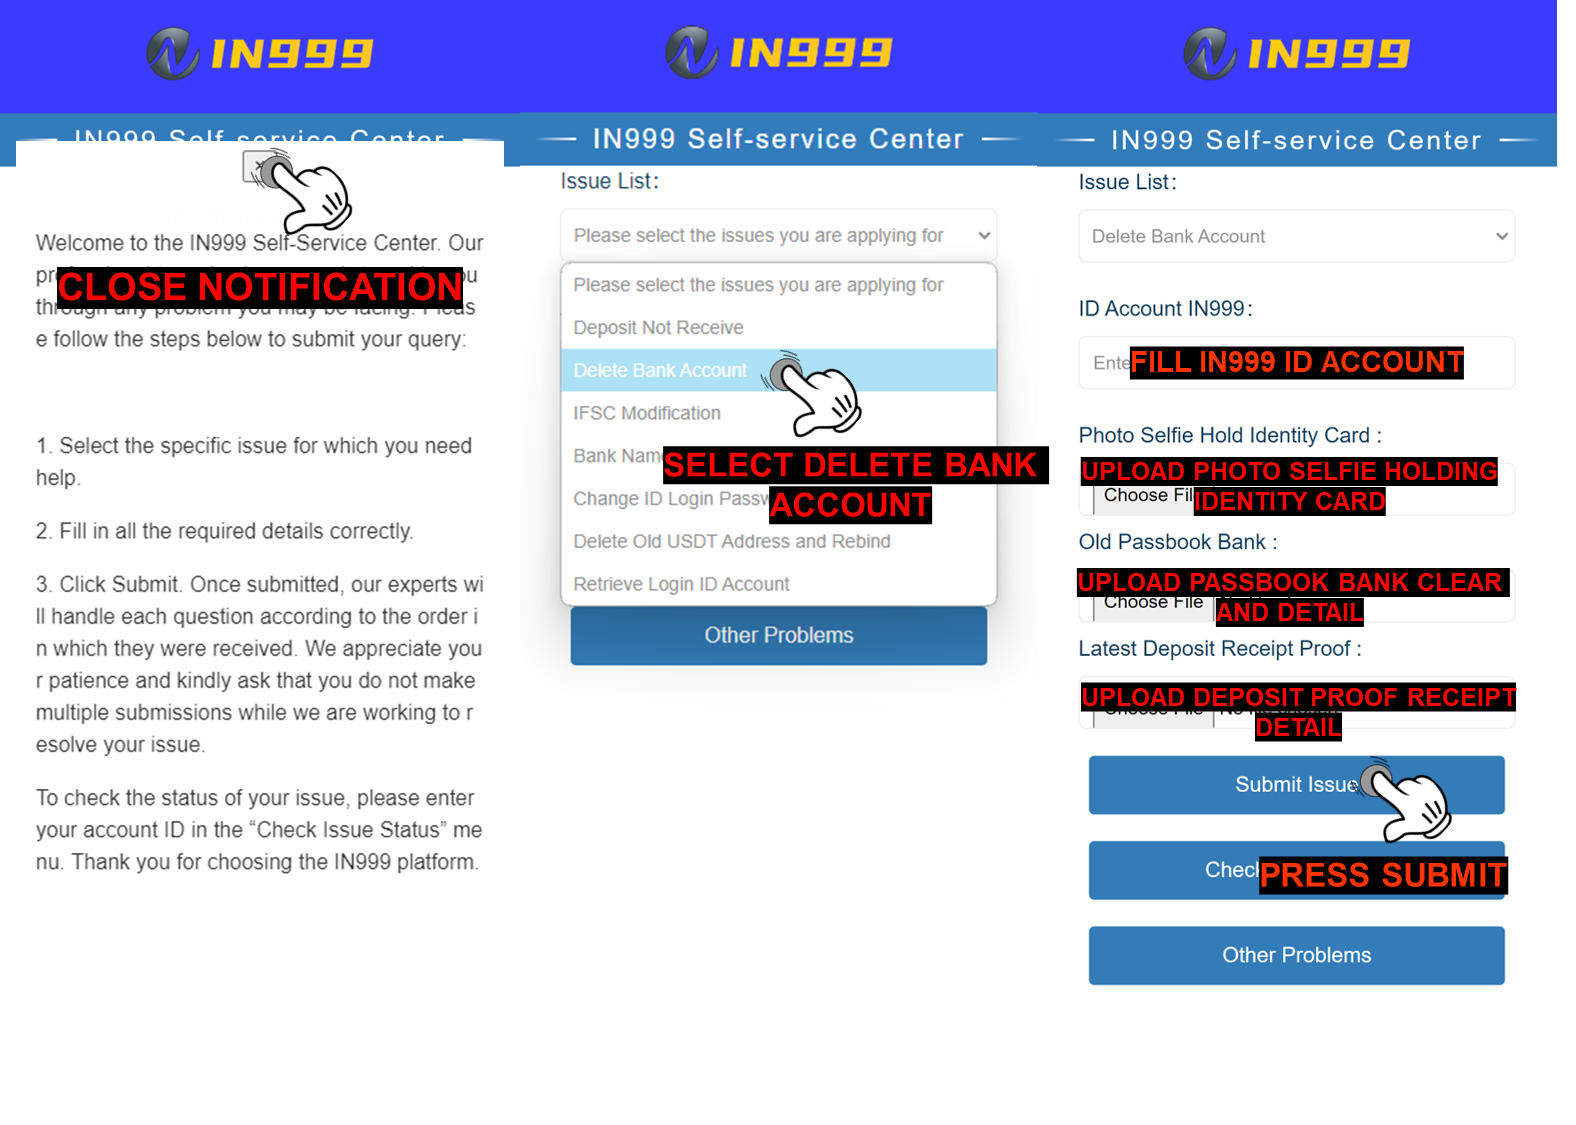
A: We suggest you to not changing the bank data since it only maintenance from the bank, but if the maintenance is taking so long you can do delete bank data account by submitting on self-service center in999 and select issue delete bank data, after success delete the bank data you can add new bank data inside your account for your future withdrawal bank by following guideline below :
1. Open self-service center in999 https://in999service.in/
2. Select Delete Bank Account
3. Fill ID account in999
4. Upload photo selfie holding identity card (clear and detail)
5. Upload photo old passbook bank (clear and detail)
6. Upload the latest deposit proof receipt (clear and detail)
7. Press Submit Issue
NOTE: Make sure all the data and requirement already fill and upload, clear and detail

Q: What i need to do after the Delete Bank Account have been completed ?
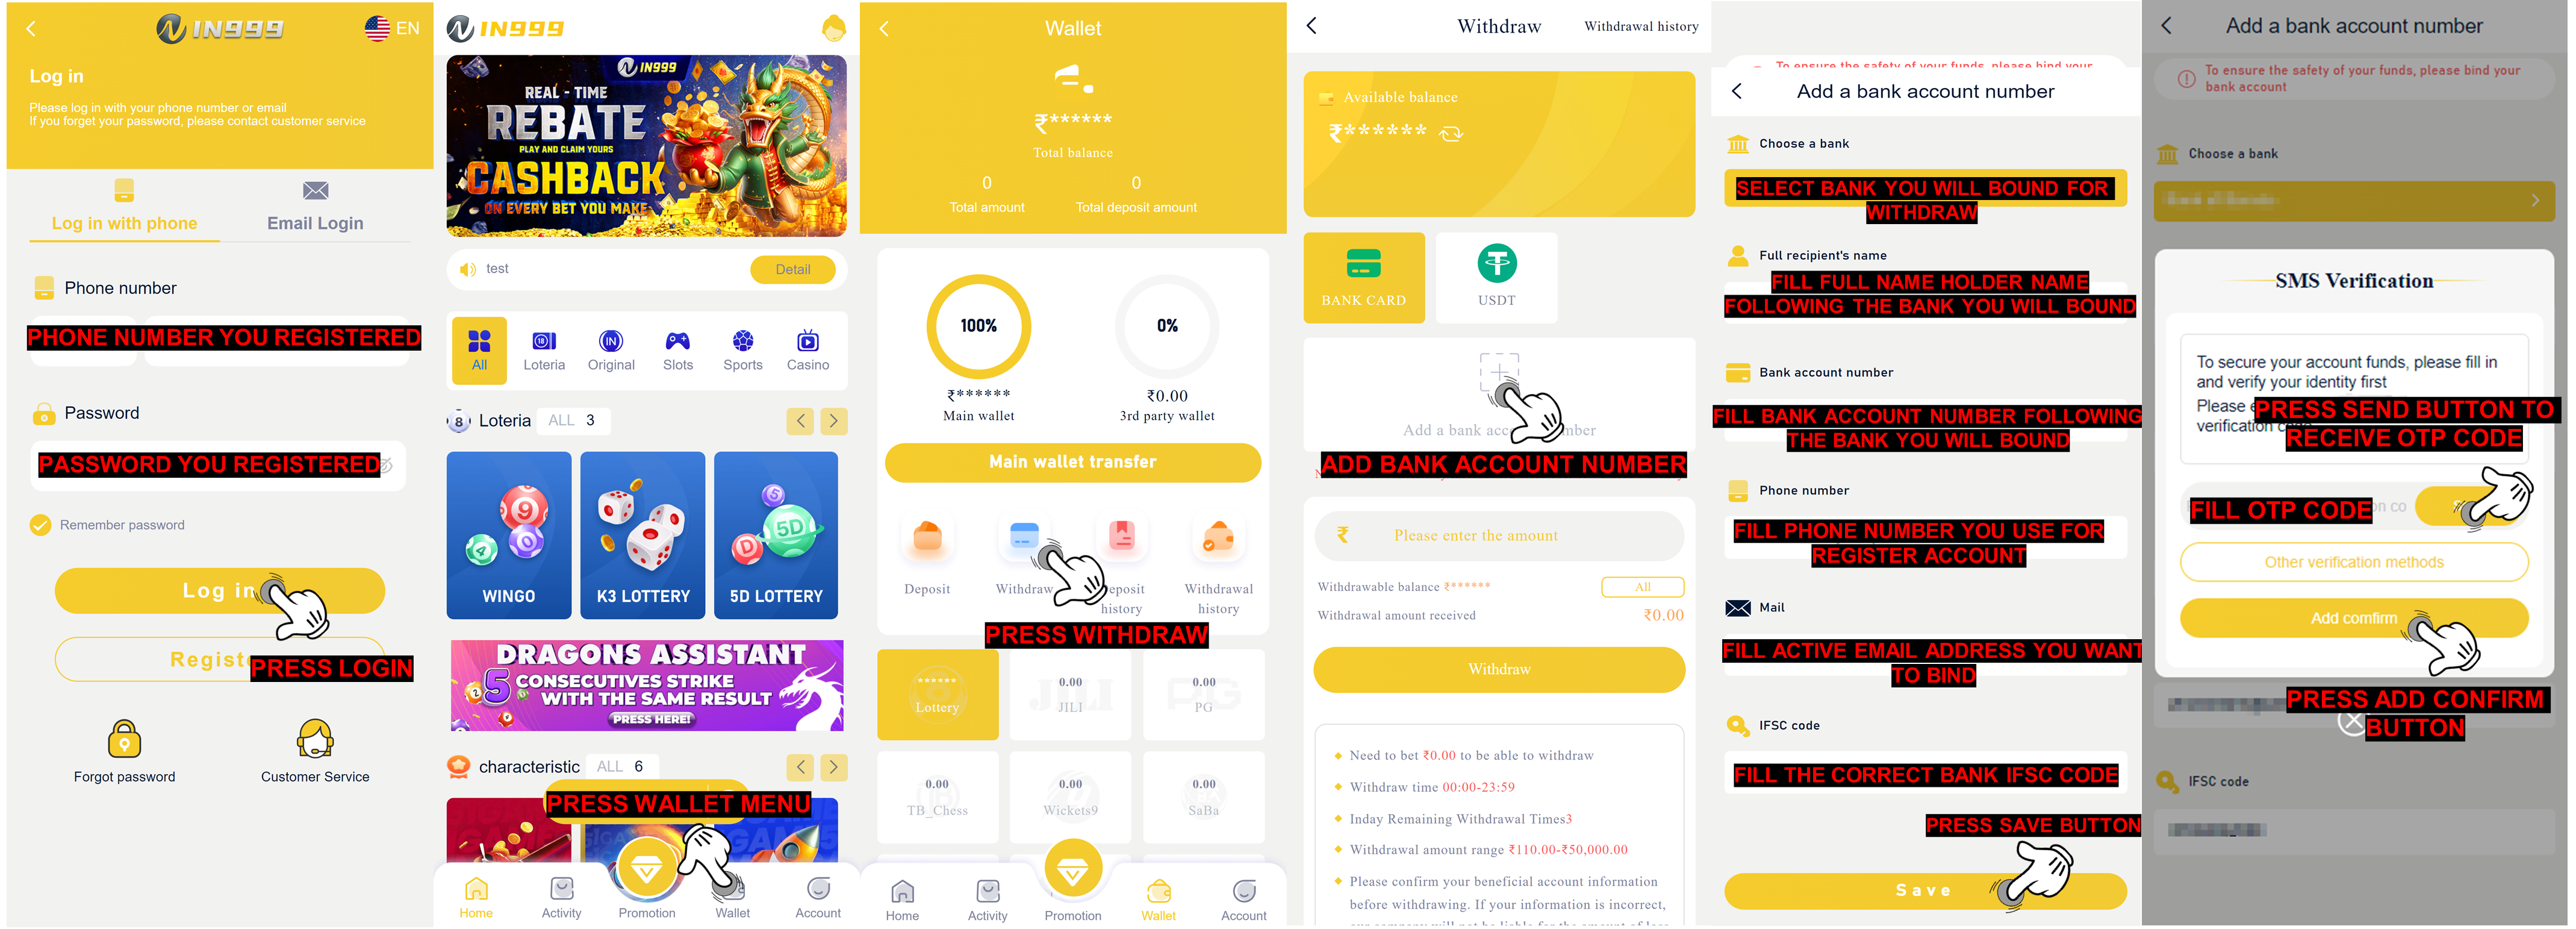
A: After the bank account deletion completed, member can add a new bank account or make a correction to the previous bank information that they bound in their ID account by go to “Withdraw”page and following the steps below :
1. Click add a bank account
2. Select the bank you want to register with
3. Fill in all the requirement information correctly (your full name, bank account number, active phone number, email address and IFSC code)
4. Click Save and SMS Verification menu will appear
5. Click the Send Button
6. Fill the correct OTP Code
7. Click Add confirm button
